【摘 要】 本文讲述的是mmdetection环境的配置,玻璃瓶瑕疵识别的故事,虽然没有获奖,但是经验满满
一、环境介绍
1.1 安装Ubuntu
版本号是18.04,下载链接。安装过程:略
18.04的自带gcc版本可以用,不用重新安装
1.2 安装显卡驱动
选择阿里源之后,选择430显卡驱动,390太老了不建议使用(显卡10以上的电脑会报错),在安装显卡驱动之前需要在bios中把Security boot关掉。具体步骤:略。
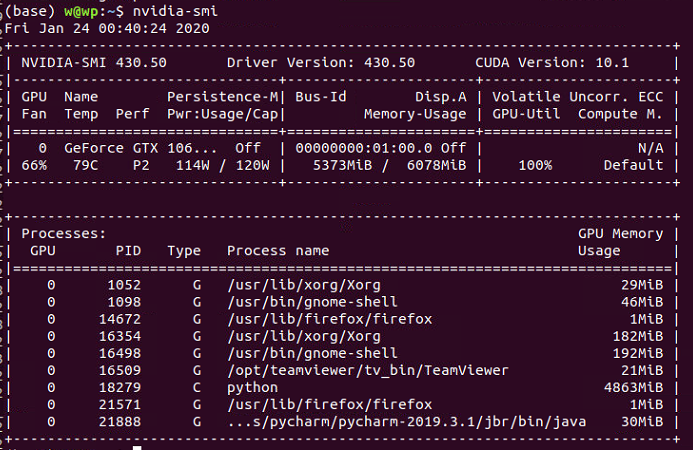
检测命令
1 | nvidia-smi |
1.3 安装cuda和cudnn
这两个是做神经网络必备的库,具体功能不清楚,在大部分教程会默认所有人拥有此库,一般没有介绍,故而报错。下载地址:
CUDA Toolkit 10.1(安装的时候,会出现一个界面,因为已经安装过显卡驱动,这里取消显卡驱动安装)
cudnn(如果进不去,说明需要注册账号,并且需要答题才能下载,选择对应版本安装就好,安装方法:双击)
cudatoolkit 10.1的下载选项设置。
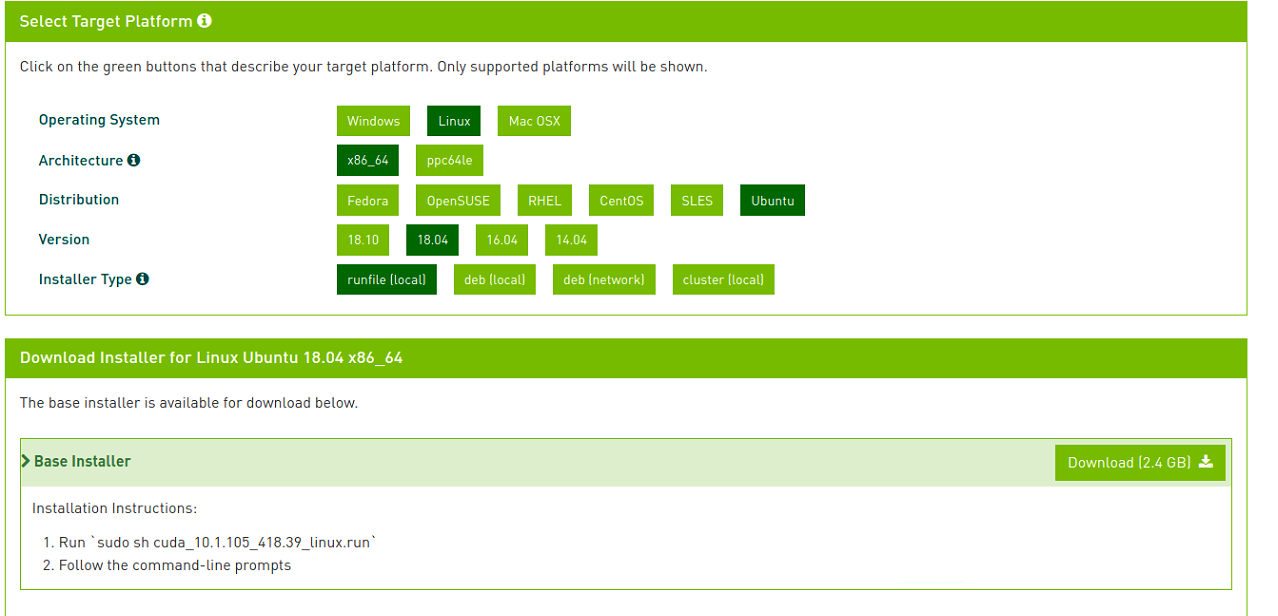
下载完成后,直接用上图最下面的命令安装,记得取消第一个显卡驱动的安装,不然会报错。
1.4 mmdetection安装
1.4.1 安装pytorch
1 | conda install pytorch=1.1.0 torchvision=0.3.0 cudatoolkit=10.0 |
1.4.2 安装cython
1 | pip install cython |
1.4.3 clone mmdetection 库
1 | git clone https://github.com/open-mmlab/mmdetection.git |
1.4.4 安装必要库
进入库的根目录下
1 | pip --no-cache-dir install -i https://mirrors.aliyun.com/pypi/simple -r requirements.txt |
等待安装完成
-i:表示使用外部安装源,这里使用阿里云镜像,安装速度贼溜
1.4.5 安装编译
1 | python setup.py install |
1.4.6 测试
1 | #如果安装成功,则该文件可以运行成功。 |
需要用到的权重文件下载:
链接:https://pan.baidu.com/s/1blfAtzi5TfLQ8gecYMD6PA 提取码:2dzb
这里需要自己设置一下权重文件的地址,和测试图片在mmdetection的demo文件夹下。
运行的时候可能会出现PIL加载错误,降低Pillow版本解决此问题:
1 | conda install pillow=6.0.0 |
运行可能会报错glibc的错误,如果报错了,恭喜你,你进入了一个深坑,解决方法:
https://www.zwenc.cn/a014cc75/
二、权重文件裁减
在第一节中下载的权重文件是对应coco数据集的,总共81个分类。这次比赛只需要11个分类,所以需要对权重文件进行裁减,裁减代码如下:
1 | def main(): |
需要自己设置的参数:
- 原权重文件地址
- 生成权重文件地址
三、数据集
知识普及tips
数据集分为训练集、验证集、测试集。
训练集:用来训练神经网络的数据集,没什么说的。
验证集:在训练的过程中,每执行一次epoch,都用验证集验证一次网络训练的怎么样,验证集一般比较小。
测试集:用来做最后的输出,得分是根据测试集的结果来的,提交的是测试集输出的结果。测试集没有对应的json文件。
3.1 清晰数据集
官方给的数据集里面有很多只有背景的数据集,这里在训练的过程中不需要这种数据,使用代码对其清洗。我这里直接使用已经清洗好的json文件。注:只需要改变json文件,不需要动真实图片。
复制后,记得在文件名后面加上后缀名(.json),不然会报错。(因为我这里加上之后上传该文档就会出现各种bug,莫法)
3.2 分割数据集
由于只有训练集没有验证集,将测试集分一部分出来给验证集,分割代码如下:
我没有分,本身训练集就小,而且验证需要双GPU,就不分了,所以这步忽略!!!!
3.3 训练数据查看
1 | import json |
四、mmdetection配置介绍(重点)
各种目标检测的配置网络都在mmdetection目标下的configs下面,只要把配置文件写好,框架会根据配置文件自动生成网络,自动训练,实际过程中只需要管配置文件就好,本小节的代码需要细看。
首先选用cascade_rcnn_r50_fpn_1x.py作为初始配置文件,查看各种资料后1,对该文件进行修改如下。
该文件的各种参数意义,查看:
如果没有配置好,我的文件可以直接复制使用,经过测试,就是最后的得分不高,绝对能跑。
其他没有细写,查看配置就好,有问题找我(前提是找到的啊)
五、训练
在根目录下,运行命令行:
1 | python tools/train.py configs/cascade_rcnn_r50_fpn_1x.py --gpus 1 |
就可以训练了。1
python tools/train.py configs/cascade_rcnn_r50_fpn_1x.py --gpus 1 --validate
—validate表示在训练时进行评估,只有在分布式训练时能够进行评估(至少两张显卡)
训练结束后,没有双卡,如何进行测试:
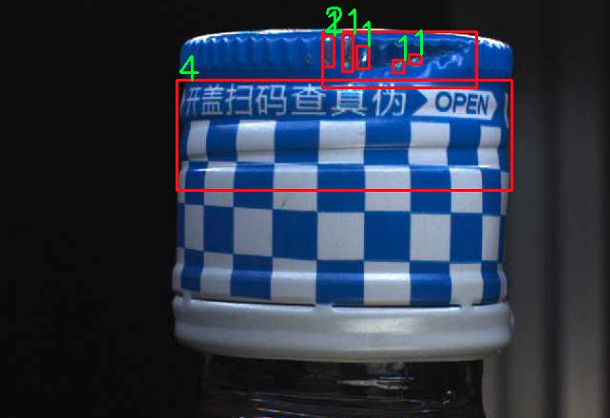
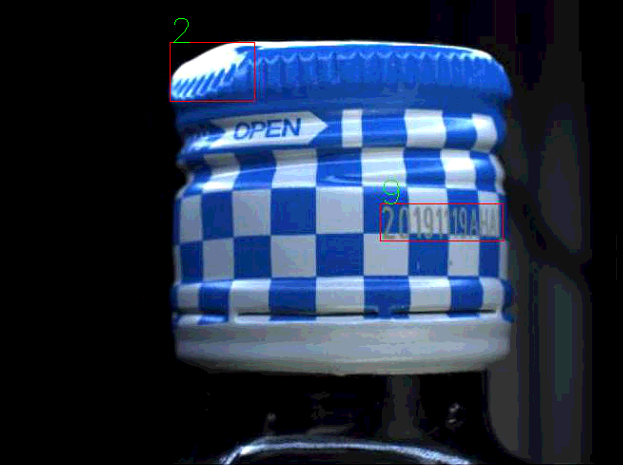
输出图片:1
python tools/test.py configs/cascade_rcnn_r50_fpn_1x.py work_dirs/cascade_rcnn_r50_fpn_1x/epoch_10.pth --show
这里因为cv2.putText()函数无法显示中文字符,故而出现乱码,实际上只需要把中文改成对应id就行,自己记住id对应的label就行。
六、提交
6.1 我的配置
提交需要用他给的代码,导入训练好的参数,和测试集的位置,生成提交文件代码如下:
1 | # encoding:utf/8 |
使用例子,在我的工程目录中,输入以下指令:
1 | python generateResult.py -m work_dirs/cascade_rcnn_r50_fpn_1x/epoch_1.pth -c configs/cascade_rcnn_r50_fpn_1x.py -im /home/w/Desktop/TC/data/test/images/ -o wen1_reslut.json |
- -m:权重地址
- -C:配置文件地址
- -im:测试图片地址
- -o:输出文件地址(一定要是json文件)
- wen1_reslut.json是最后要提交的文件。
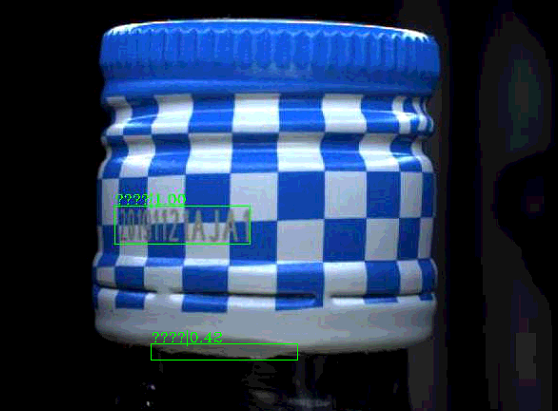
在程序中,可以通过imageShow变量来控制是否显示测试输出结果,示例结果如下:
6.2 注意事项
提交代码里面,有个label重映射,这是因为在训练的时候,每个样本对应的标签label和官方给的不一样。
为什么呢?
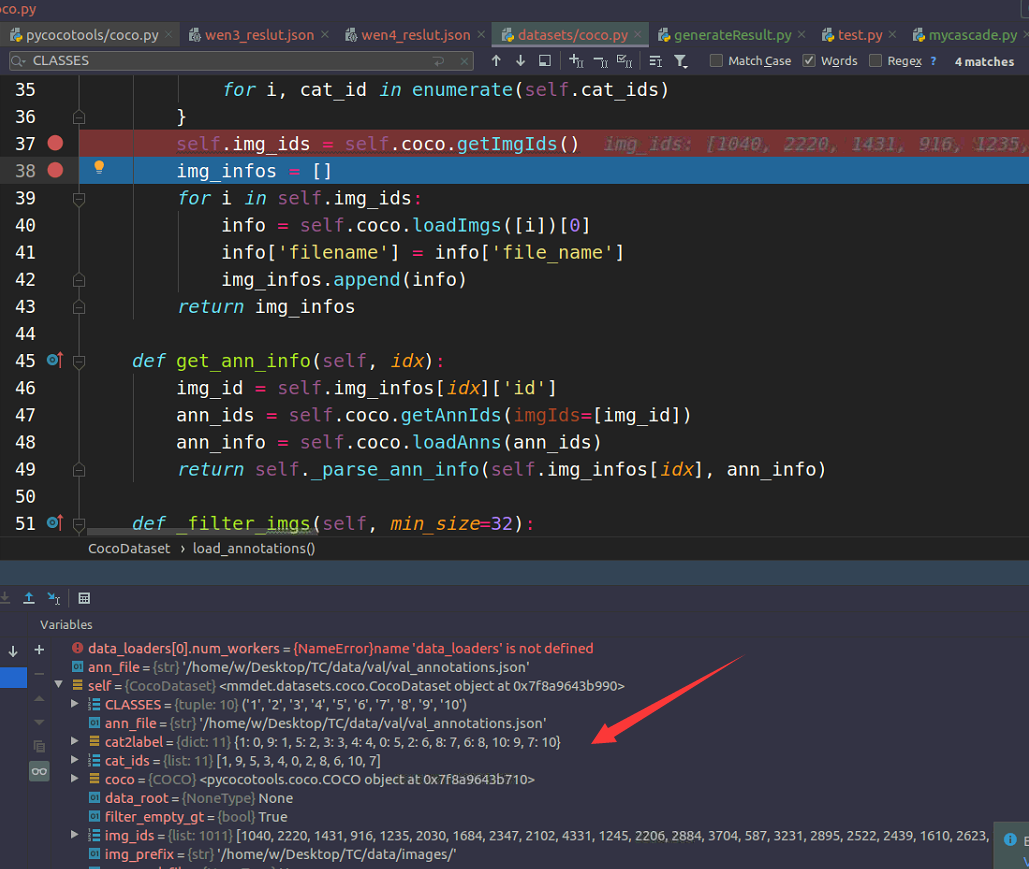
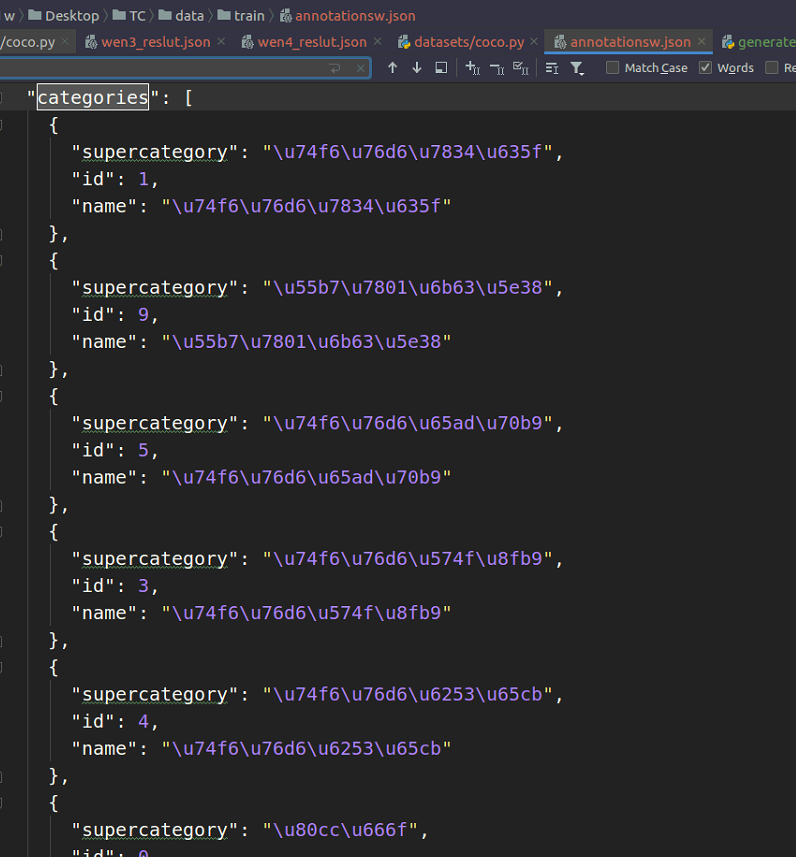
经过debug跟踪调试,程序在读取annotation.json文件的时候,对每个id进行从映射,重映射的规则是按照annotation.json文件里面的categories的循序来的,如下两图所示。每个人可能不一样,需要进行调试确认重映射是否正确。
6.3 如何找到这个映射位置
Emmmm,不太好些,就乱写吧。
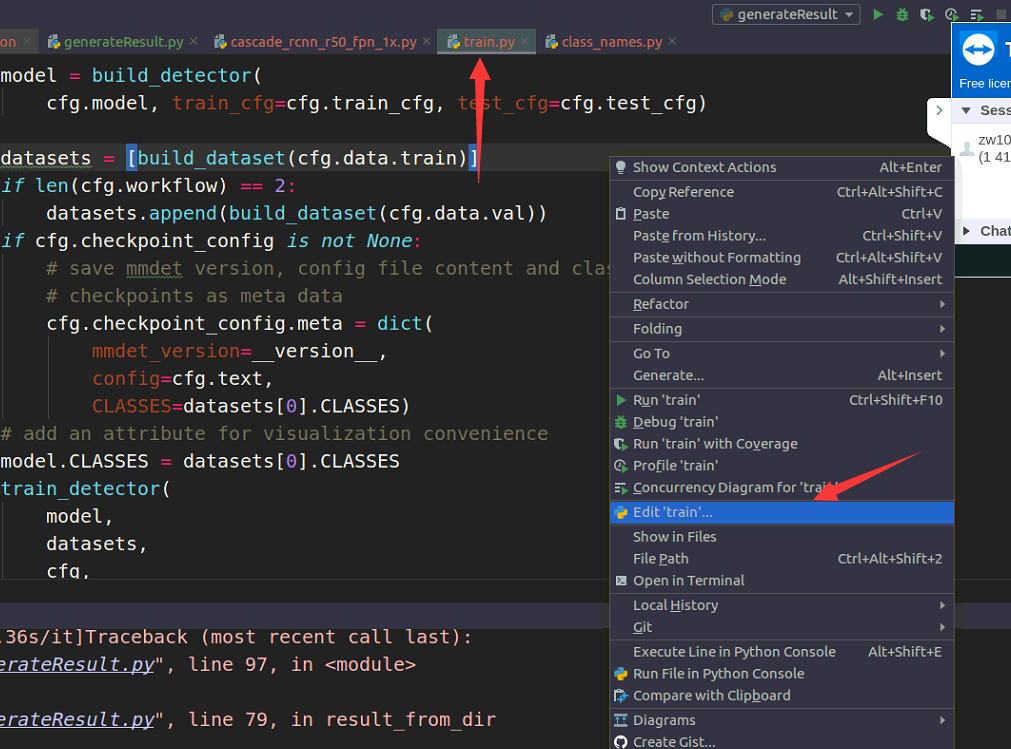
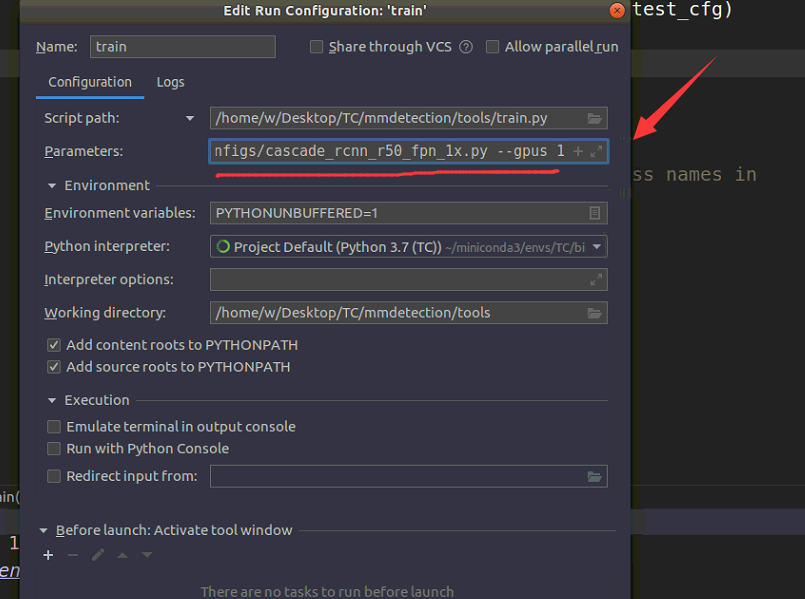
- 首先确认入口函数:tools/train。
- 设置好参数,怎么设置啊??看下面两图,这里的函数和命令行中输入的参数一致,注意地址要正确(不正确会直接报错,你肯定会发现的)
- 然后在datasets/coco.py文件的对应位置打上断点。
- 开始调试
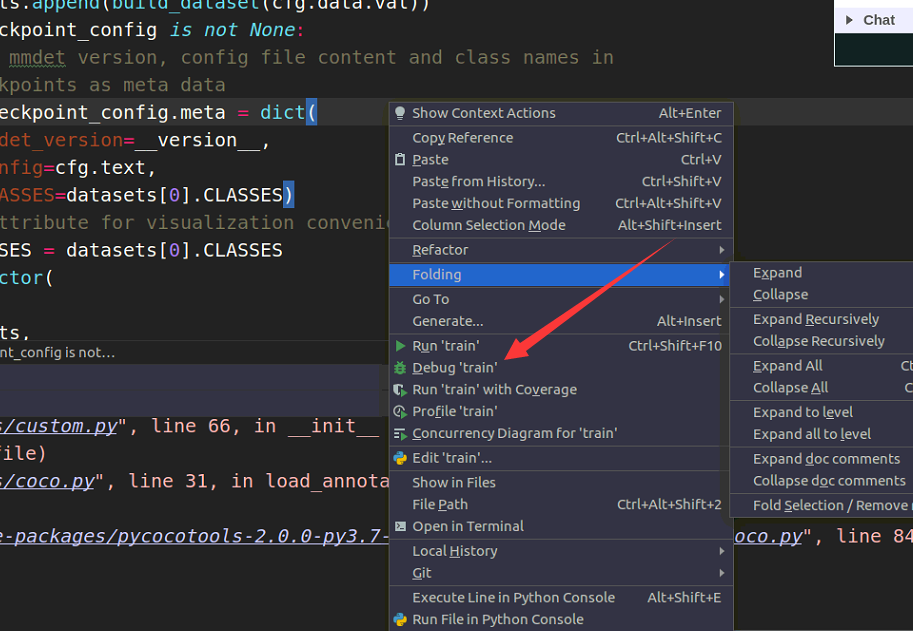
此时就可以一步一步跟踪查看每个变量。
胡说八道结束,我也不知道我说了啥
6.4 不使用重映射的方法
在datasets/coco.py文件的_parse_ann_info函数中,将
1 | gt_labels.append(self.cat2label[ann['category_id']]) |
修改为:
1 | gt_labels.append(ann['category_id']) |
即可!!
七、训练配置
(非必要部分)
为了训练中可以看到哪个训练输出的信息,哪个是验证输出的信息。分别在
/home/w/miniconda3/envs/TC/lib/python3.7/site-packages/mmcv/runner/runner.py
文件的train和val中添加打印信息:
1 | self.logger.info("train process") |

不明觉厉
八、训练日志
- 2020.1.27:cascade_faster_rcnn epoch10 0.24 500 # 无预训练权重
- 2020.1.28:macascade_faster_rcnn epoch12 0.44 500 # 有预训练权重
- 2020.1.28:macascade_faster_rcnn epoch6 0.39 500 # 有预训练权重
- 20201.29: macascade_faster_rcnn epoch12 0.53 496 # 有预训练权重
- 20201.29: macascade_faster_rcnn epoch20 0.54 492 # 有预训练权重
参考文献
1. mmdetection使用tensorboard可视化训练集与验证集指标参数 ↩