一、环境介绍
- 系统:win10
- 语言:python3.7
- 依赖库:opencv、numpy、PyQt
二、功能说明
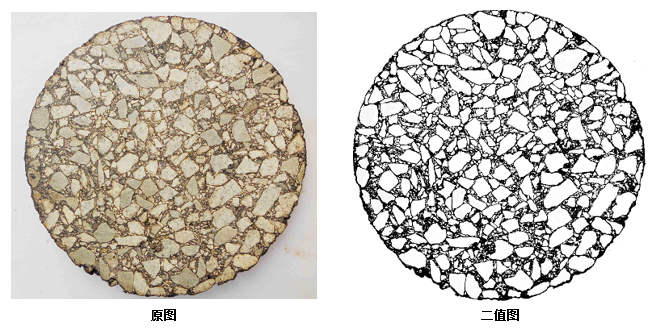
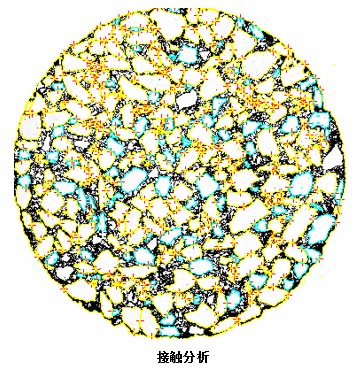
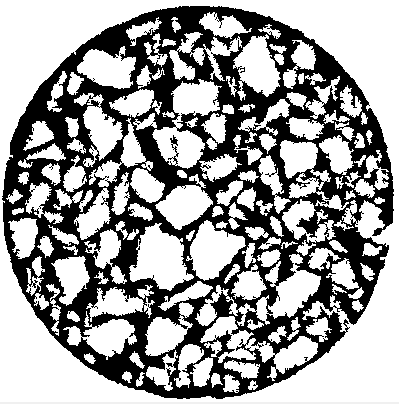
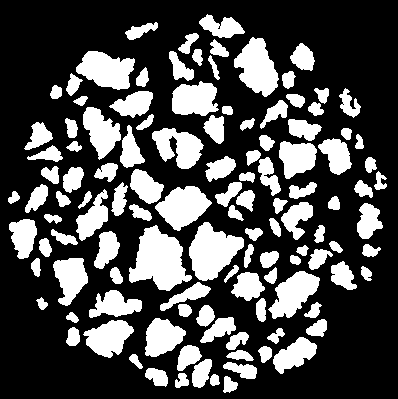
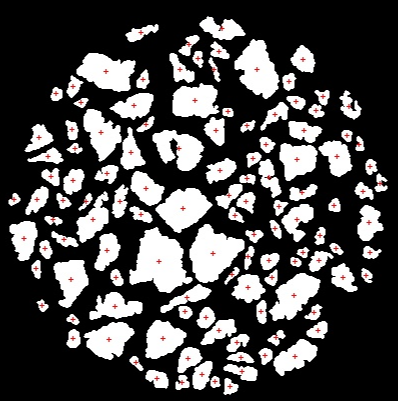
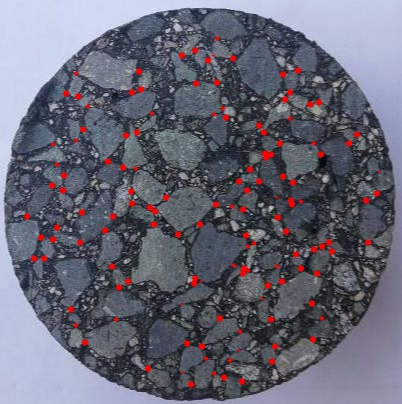
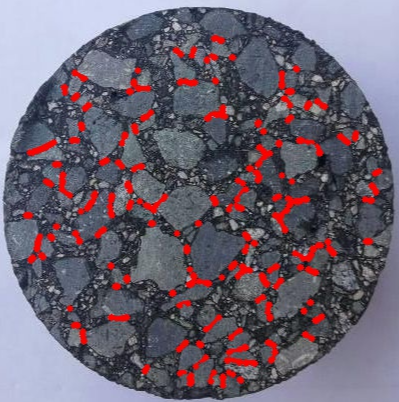
实际工程中,为了得知路面沥青质量的好坏,需要对其进行数据分析。如下三幅图所示,原图是路面沥青切片,第二幅图是原图的二值化图像(处理的这么好,当然是PS的),第三幅图画出了原图沥青石块之间的接触点。如果人工进行标注的话,工程量过于巨大,所以现在需要通过软件来实现对原图完成数据分析,需要完成以下几个功能点:
- 二值化处理(难点)
- 石块接触分析:以二值化后的图像为基础,计算每个石块的面积,标记出石块间的接触点,计算每个石块质心位置。
- 输出图像:
- 大于2.36mm粗石料接触点位置(两张:点接触图像、线接触图像)
- 接触点连接图
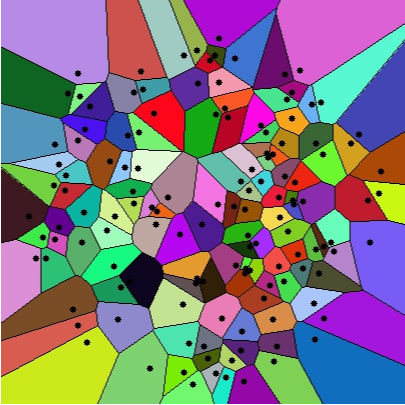
- 接触点Voronoi图
- 大于2.36粗石料的形心连接图
- 输出参数:
- 相互接触大于2.36mm粗石料的面积
- 接触点总数量
- 平均匹配数
- 图像总面积
- 接触石料总面积
- 只有一个接触点石料的总面积
- 无接触石料的总面积(未完成)
- 参数A:接触石料总面积/图像总面积
- 参数B:无接触石料总面积/图像总面积
三、实现步骤
在本小节,由于Qt界面的实现太没有技术含量,省略,不介绍。
3.1 二值化
经过不停的摸索,翻遍了百度、google、论文,没有一步就可以将其二值化到上图所示的方法,什么OSTU1算法是不行的,由于它是统计整张图片的像素直方图,在光照不均匀的情况下,会产生极大的误差,阴暗位置会产生极大的误差。
(如果有足够的数据集,应该可以使用U-net来做)
为了得到合适的二值化图像,采用opencv的adaptiveThreshold自适应二值化2函数,该函数是基于小窗口二值化方法,在光照不均匀的情况下也可以得到较好的二值化结果,但是这种方法由于其本身的特性,虽然得到较好的轮廓效果,但是也会产生较大的噪声,如下图所示:
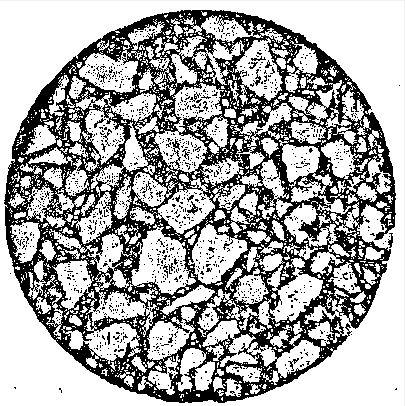
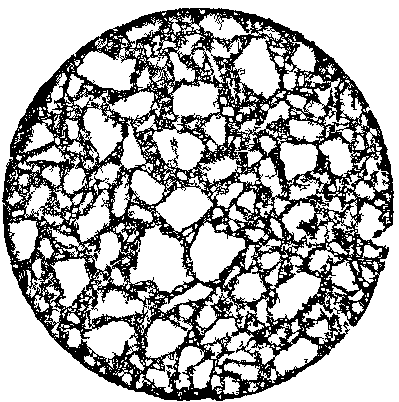
在上图中,虽然噪声对,但是轮廓也比较明显,接下来需要借用到opencv的findContours轮廓分析3方法,在参考文献中记录了该方法的使用方法,以及一些应用方法。首先使用该方法去除石块外的其他噪声,去除结果如下:

接下来,采用findContours给出深度3信息(用到多叉树遍历算法,不能使用递归,python的机制里面,一个函数重复调用2000多次后,会强制中断程序,需手动构建堆栈),去除掉最里面的轮廓,去除结果如下:
接下来,采用findContours给出的轮廓大小信息,去除掉小于用户指定尺寸的石块,结果如下所示:
看的出来,噪声还是很大,没关系,因为这不是最后的二值化图像,还需要使用分水岭算法进行最终的处理,处理之后根据findContours方法去除小碎块和最外层边框,处理结果如下:
至此,石块的二值化结束(为什么和要求的不一样,因为这种二值化,更加方便后续处理),不去除最外层边框就可以和第二章功能说明里面一样!!
3.2 计算石块面积
在opencv中通过contourArea结合findContours方法可以快速得到每个块的像素点个数,成功得到每个块的面积。
1 | self.blocksSize.append([contourIndex, cv2.contourArea(contrs)]) |
- contourIndex:为石块的下标。
- cv2.contourArea(contrs):该石块的面积
将每个石块的大小记录在self.blocksSize。
3.3 计算接触点
点接触:两个石块之间只显示一个接触点。
线接触:两个石块之间,显示满足阈值距离的所有接触点
3.3.1 分析
这一步需要得到点接触和线接触,而点接触可以从线接触中获得,所以先获得所有的线接触。实现步骤:
- 对每个石块的边缘进行标记,通过像素标记,如果是1,则其像素为(0,0,1)。
- 遍历所有的块,在每个块的边缘,以圆为半径找其他块的边缘,满足则记录在数据中。
- 点接触:在线接触中,提取出点接触
3.3.2 对石块标记
直接上代码,通俗易懂:
1 | def generateMasker(self, contour): |
输入是通过findContours得到的轮廓信息,返回的masker就是编码成功的图层。
3.3.3 计算线接触
暴力法计算点附近是否有临近点,代码比较复杂,但原理比较简单,动图比较通俗易懂,直接上GIF:
红色是所有满足条件的接触点,边框变绿表示该轮廓已经计算过,不再参与计算,可以看到,计算速度比较慢,毕竟是暴力法计算。
再说一下数据结构,看代码中的注释就好,将上面得到的接触点存入下面的数据结构中,后面使用起来就会美滋滋。
1 | # -*- coding: utf-8 -*- |
3.4 计算形心位置
opencv一键操作
1 | retval, labels, stats, centroids = cv2.connectedComponentsWithStats(thresh) |
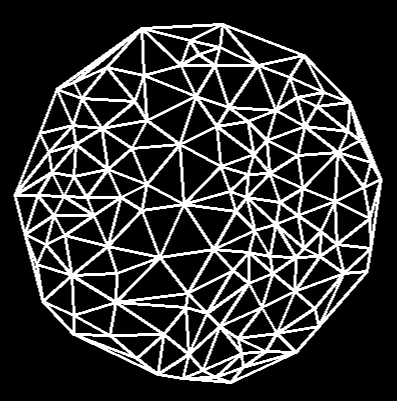
3.5 画形心连接图
使用cv2.Subdiv2D一键操作
1 | im_gray = cv2.cvtColor(self.marbleinformation.blockImage, cv2.COLOR_RGB2GRAY) |
3.6 画接触点Voronoi图
得到接触点之后,opencv一键操作
1 | img = np.zeros_like(self.marbleinformation.image) |
四、结果展示
形心图:
形心连接图:
点接触图:
线接触图:
接触点Voronoi图:
参数输出:
1 | 接触点数量:133 |
1 | 块大小: |
Qt操作界面展示:
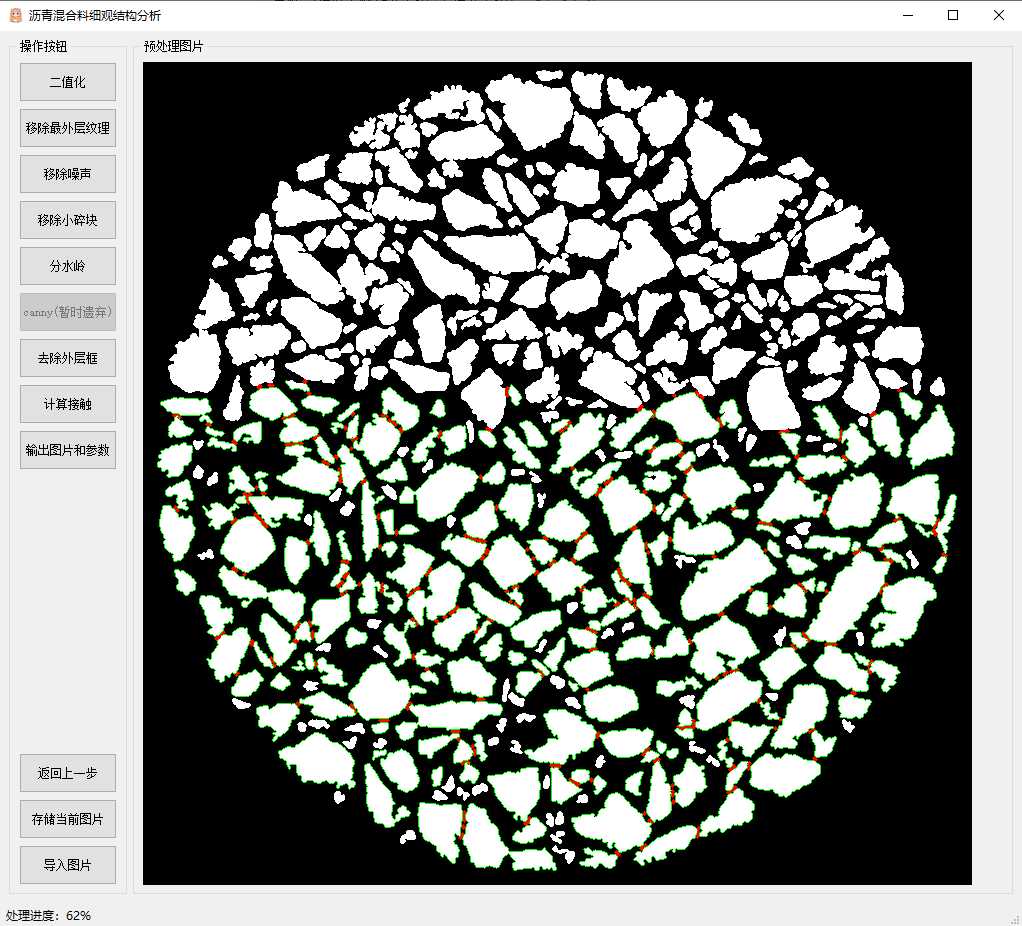
有些点(边缘为白色的小石块)没有计算,是因为不满足设置的最小石块的大小,所以会跳过计算。
五、总结
本次项目从上手,到结束大概用了2个多月时间,一来是因为事情比较多,二来也是因为初步接触图像处理方向,不太熟悉。写完总结,本项目就告一段落了,感谢在项目中帮助我的所有人,在下收获颇丰。
高兴之余说一下不足的地方
- Voronoi图不应该连接图片边界,而是应该连接石块边界。
- 分水岭算法做的不好,石块大小没有完全还原,误差相对较大。
(代码暂时没有考虑上传)
参考文献
1. OSTU(大津算法) ↩
2. adaptiveThreshold()函数 ↩
3. opencv - 轮廓查找和简单操作 ↩